Deploying OpenShift on Proxmox with Terraform Automation
Deploying OpenShift on Proxmox with Terraform Automation
Running OpenShift in a home lab is a great way to have an enterprise-grade Kubernetes and container orchestration platform. Unlike managed services like AWS EKS (Amazon Elastic Kubernetes Service) or Azure AKS, running on Proxmox gives you full control over the infrastructure, making it perfect for mastering DevOps practices. In this guide, I'll walk you through deploying a fully functional OpenShift cluster on Proxmox VE using the Agent-based installer and Terraform for infrastructure automation.
While Docker revolutionized how we package applications, OpenShift takes it a step further by providing a complete platform for deploying and managing those containers. You can even integrate this setup with Jenkins for robust CI/CD pipelines, simulating a real-world production environment that rivals what you'd find on AWS.
Architecture Overview
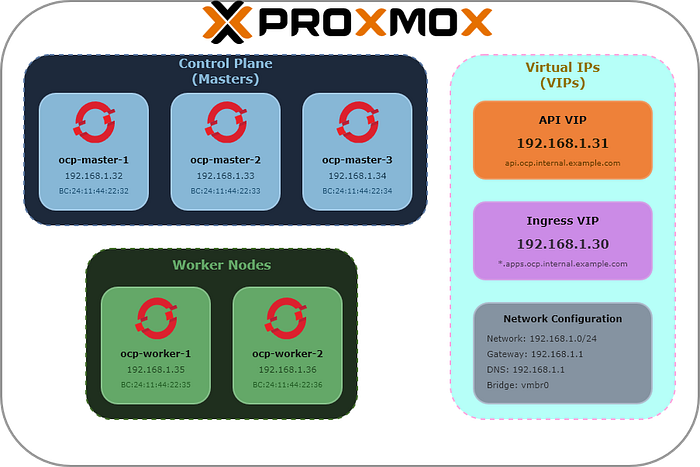
This setup deploys a 5-node OpenShift cluster which can be customized as needed programmatically via Terraform:
- 3 Master nodes — Running the control plane (etcd, API server, controllers)
- 2 Worker nodes — Running application workloads with additional storage disks for LVM
The cluster uses static IP addresses with the Agent-based installer, which provides a streamlined installation experience without requiring a separate bootstrap node. This could also be replicated for a larger and production-like environment by increasing the number of masters and workers as needed.
Network Diagram
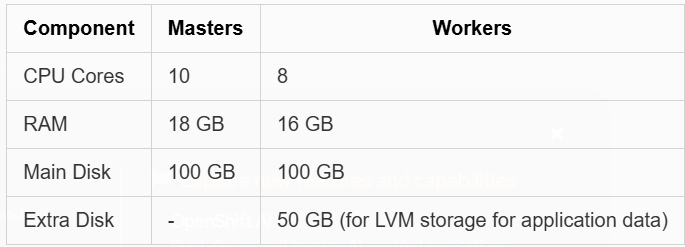
Cluster Specifications
Network Layout

Additionally, you'll need:
- API VIP: 192.168.1.31
- Ingress VIP: 192.168.1.30
The nodes will have the IPs assigned statically via the configuration of the network DHCP server but you can also set them manually in Proxmox if needed. The access to the cluster will use the defined VIPs which require setting up DNS records accordingly.
Prerequisites
Required Tools
Before starting, ensure you have these tools installed on your workstation:
- Terraform (>= 1.0.0)
- openshift-install — Download from Red Hat Console
- oc (OpenShift CLI) — Download from the same location
- nmstatectl — Install via your package manager (required to generate the ISO image)
# Fedora/RHEL which is usually already installed
dnf install nmstate

# Other distros or Mac/WSL2 via Rust
# Install Rust using rustup
curl https://sh.rustup.rs -sSf | sh
# and the package
cargo install nmstatectl
DNS Configuration
Configure your DNS server with the following records pointing to your cluster:
Here I defined that my cluster will be published at the domain ocp.internal.example.com. Adjust accordingly to your domain.
; API and API-INT records (point to API VIP)
api.ocp.internal.example.com.     A    192.168.1.31
api-int.ocp.internal.example.com. A    192.168.1.31

; Wildcard for applications (point to Ingress VIP)
*.apps.ocp.internal.example.com.  A    192.168.1.30

; Individual node records
ocp-master-1.ocp.internal.example.com. A 192.168.1.32
ocp-master-2.ocp.internal.example.com. A 192.168.1.33
ocp-master-3.ocp.internal.example.com. A 192.168.1.34
ocp-worker-1.ocp.internal.example.com. A 192.168.1.35
ocp-worker-2.ocp.internal.example.com. A 192.168.1.36
Red Hat Pull Secret
Obtain your pull secret from Red Hat Console — you'll need this for the installation configuration.
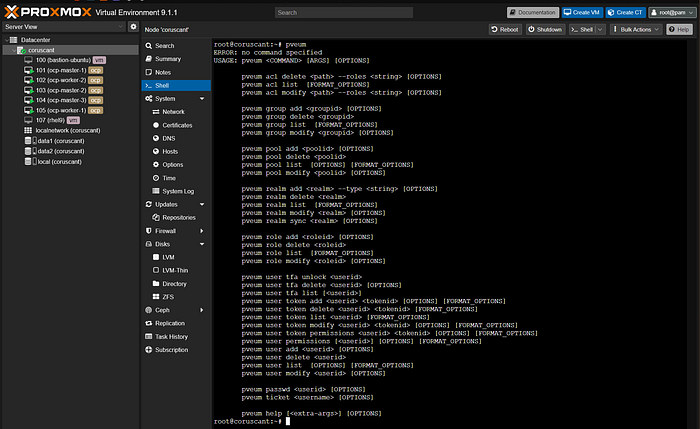
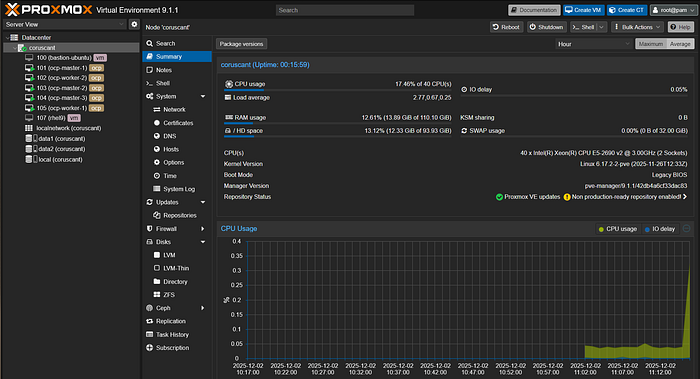
Proxmox Configuration
Creating API Users for Terraform
Connect to your Proxmox host via SSH or console and create the required users and roles:
# Create a role with necessary privileges for Terraform
pveum role add terraform-role -privs "VM.Allocate VM.Clone VM.Config.CDROM VM.Config.CPU VM.Config.Cloudinit VM.Config.Disk VM.Config.HWType VM.Config.Memory VM.Config.Network VM.Config.Options VM.Audit VM.PowerMgmt Datastore.AllocateSpace Datastore.Audit Sys.Audit Pool.Allocate Sys.Console Sys.Modify VM.Migrate SDN.Use VM.GuestAgent.Audit VM.GuestAgent.Unrestricted Pool.Audit"

# Create the Terraform user and assign the role
pveum user add terraform@pve
pveum aclmod / -user terraform@pve -role terraform-role

# Create an API token for Terraform (save the output!)
pveum user token add terraform@pve terraform-token --privsep=0
The token creation will output something like:
┌──────────────┬──────────────────────────────────────┐
│ key          │ value                                │
╞══════════════╪══════════════════════════════════════╡
│ full-tokenid │ terraform@pve!terraform-token        │
├──────────────┼──────────────────────────────────────┤
│ value        │ xxxxxxxx-xxxx-xxxx-xxxx-xxxxxxxxxxxx │
└──────────────┴──────────────────────────────────────┘
Save the token value — you'll need it for the Terraform configuration.
Configuration Files
install-config.yaml
This file defines your OpenShift cluster configuration:
---
apiVersion: v1
baseDomain: internal.example.com
compute:
  - architecture: amd64
    hyperthreading: Enabled
    name: worker
    replicas: 2
controlPlane:
  - architecture: amd64
    hyperthreading: Enabled
    name: master
    replicas: 3
metadata:
  name: ocp
networking:
  clusterNetwork:
    - cidr: 10.128.0.0/14
      hostPrefix: 23
  machineNetwork:
    - cidr: 192.168.1.0/24
  networkType: OVNKubernetes
  serviceNetwork:
    - 172.30.0.0/16
platform:
  baremetal:
    apiVIPs:
      - "192.168.1.31"
    ingressVIPs:
      - "192.168.1.30"
pullSecret: '<your-pull-secret-here>'
sshKey: "<your-ssh-public-key>"
Replace baseDomain, pullSecret, sshKey, and adjust parameters as needed.
agent-config.yaml
This file defines the network configuration for each node:
---
apiVersion: v1alpha1
kind: AgentConfig
metadata:
  name: ocp
rendezvousIP: 192.168.1.32
hosts:
  - hostname: ocp-master-1
    role: master
    rootDeviceHints:
      deviceName: /dev/sda
    interfaces:
      - name: enp6s18
        macAddress: BC:24:11:44:22:32
    networkConfig:
      interfaces:
        - name: enp6s18
          type: ethernet
          state: up
          mac-address: BC:24:11:44:22:32
          ipv4:
            enabled: true
            address:
              - ip: 192.168.1.32
                prefix-length: 24
            dhcp: false
      dns-resolver:
        config:
          server:
            - 192.168.1.1
      routes:
        config:
          - destination: 0.0.0.0/0
            next-hop-address: 192.168.1.1
            next-hop-interface: enp6s18
            table-id: 254
  # Similar blocks for other nodes...
terraform.tf
Here's the complete Terraform configuration that automates the entire deployment:
terraform {
  required_providers {
    proxmox = {
      source  = "telmate/proxmox"
      version = "3.0.2-rc06"
    }
  }
  required_version = ">= 1.0.0"
}

variable "install_dir" {
  description = "Directory where OCP installation files will be created"
  type        = string
  default     = "ocp-proxmox"
}

# ... (Rest of the Terraform configuration provided in the original text)
(Refer to the full gist or previous text for the complete code)
Deployment
Step 1: Initialize and Apply Terraform
export INSTALL_DIR=ocp-proxmox
terraform init
terraform plan -out plan
terraform apply plan
Step 2: Monitor Installation Progress
export KUBECONFIG=$INSTALL_DIR/auth/kubeconfig
./openshift-install agent wait-for install-complete --dir=$INSTALL_DIR
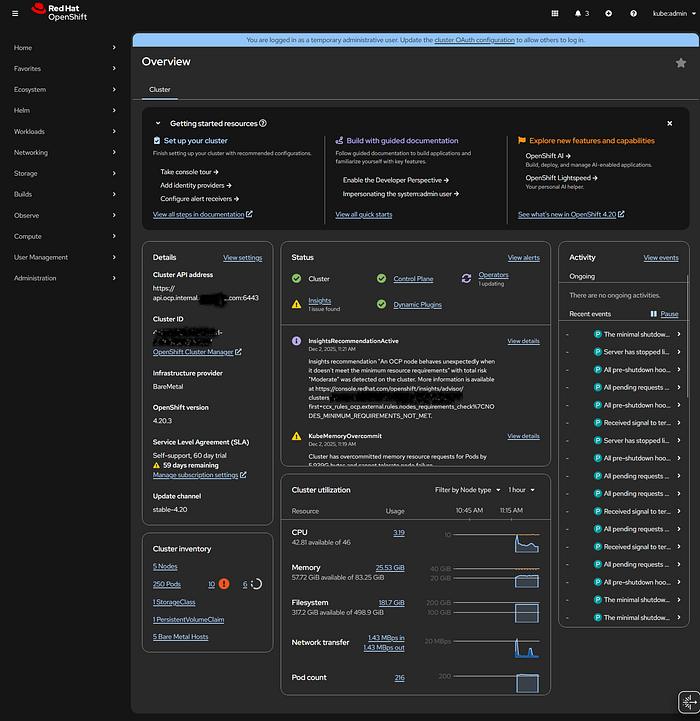
Step 3: Access Your Cluster
export KUBECONFIG=$INSTALL_DIR/auth/kubeconfig
oc get nodes
oc whoami --show-console
Post-Installation Configuration
Make Masters Schedulable (Optional)
oc patch schedulers.config.openshift.io cluster --type merge \
  --patch '{"spec":{"mastersSchedulable": true}}'
Configure LVM Storage
To use the extra disks on worker nodes for persistent storage, install the LVM Storage Operator.
1. Create the Operator Subscription
Create LVMStorage-Operator.yml and apply it.
2. Identify the Extra Disks
ssh core@ocp-worker-1 'ls -l /dev/disk/by-path/'
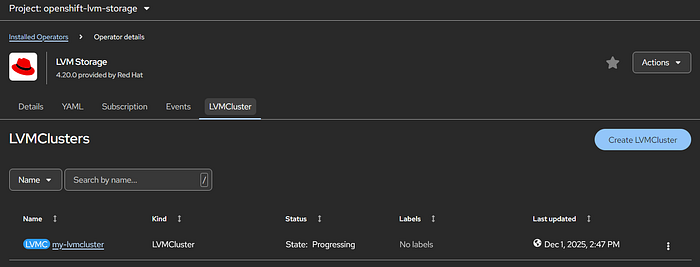
3. Create the LVMCluster
Create LVMStorage.yml and apply it.
Conclusion
With this setup, you have a fully automated OpenShift deployment on Proxmox. The Terraform configuration handles everything from ISO generation to VM provisioning, making it easy to tear down and rebuild your cluster as needed.
All configuration files mentioned in this post are available in the accompanying gist.